Announcement

Collapse
No announcement yet.

You guys might like my new truck engine

Collapse
X
 
  • Filter
  • Time
  • Show
Clear All
new posts

  • Xnke
    replied
    Goofed around some more on this tonight. Here's the intercooler core, and yes, it's not very big. The core area is slightly larger than the supercharger outlet area.


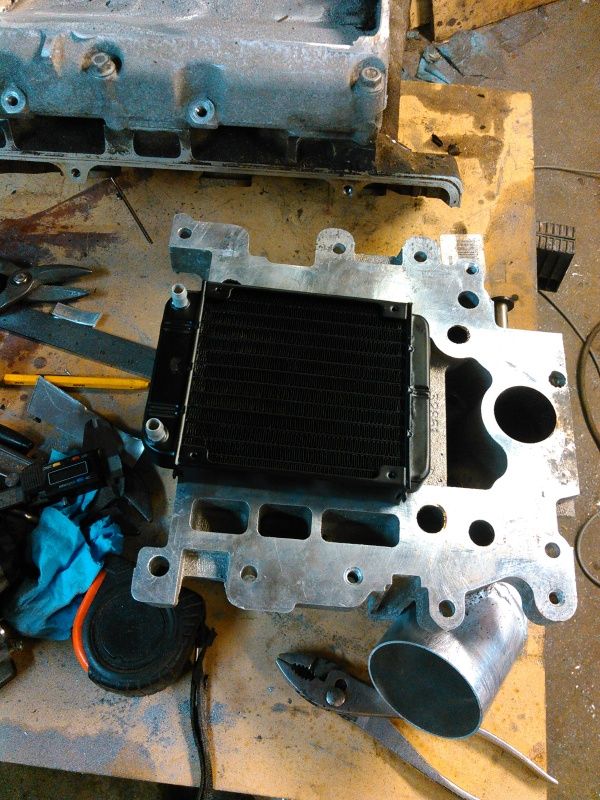
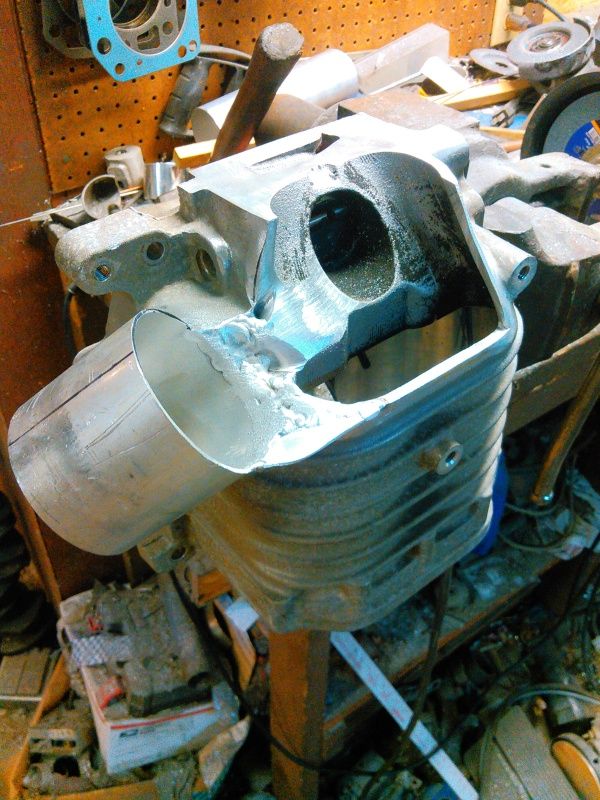
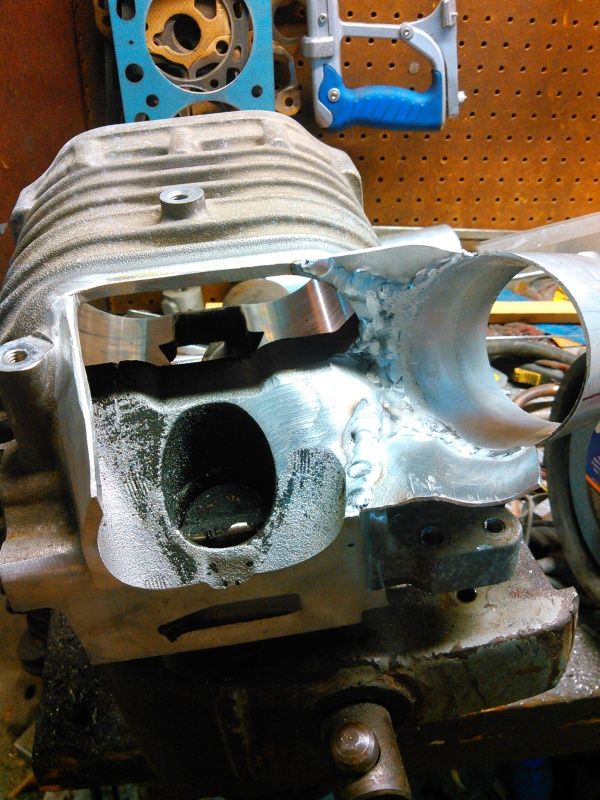
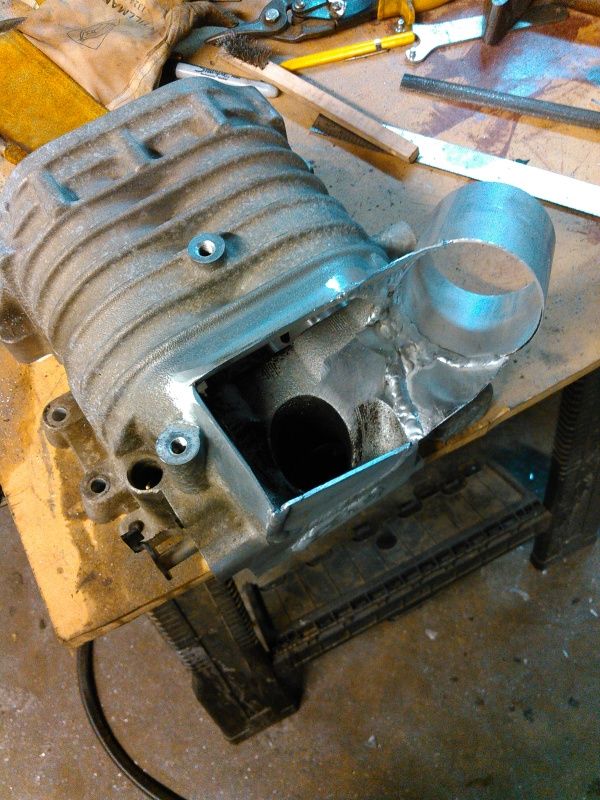
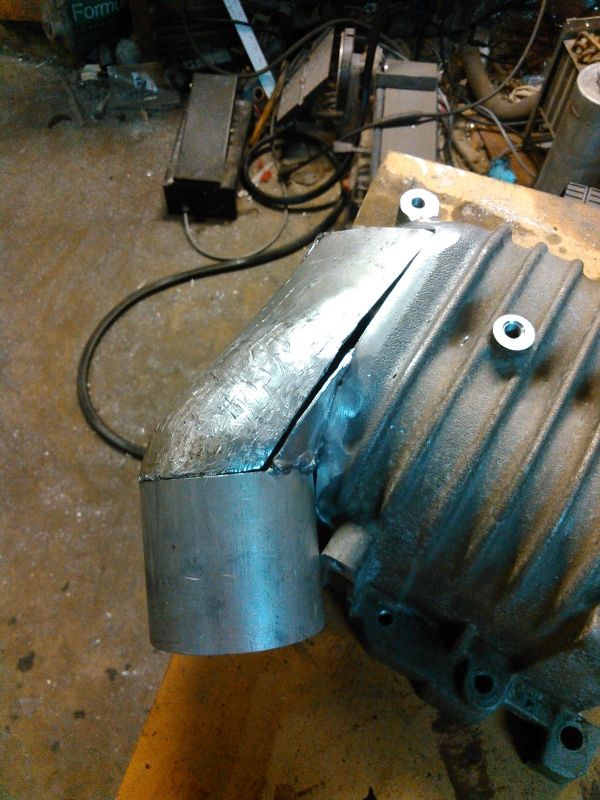
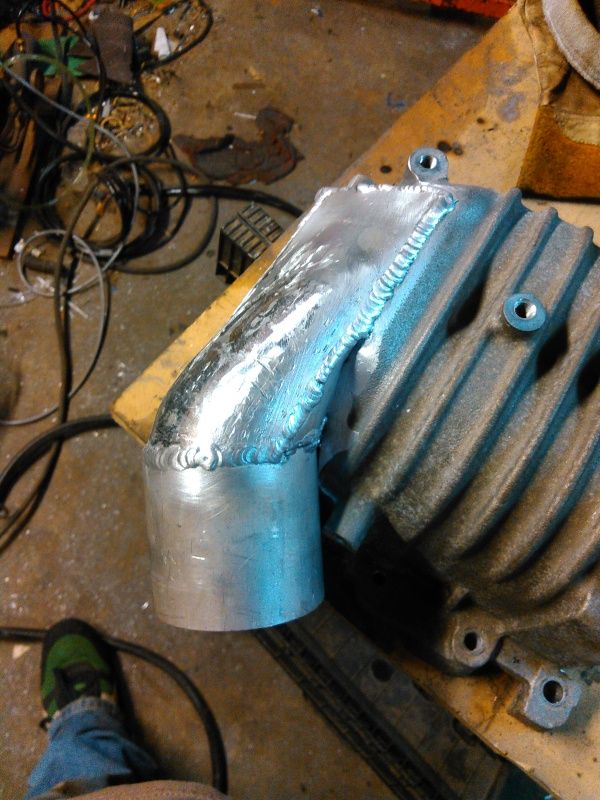
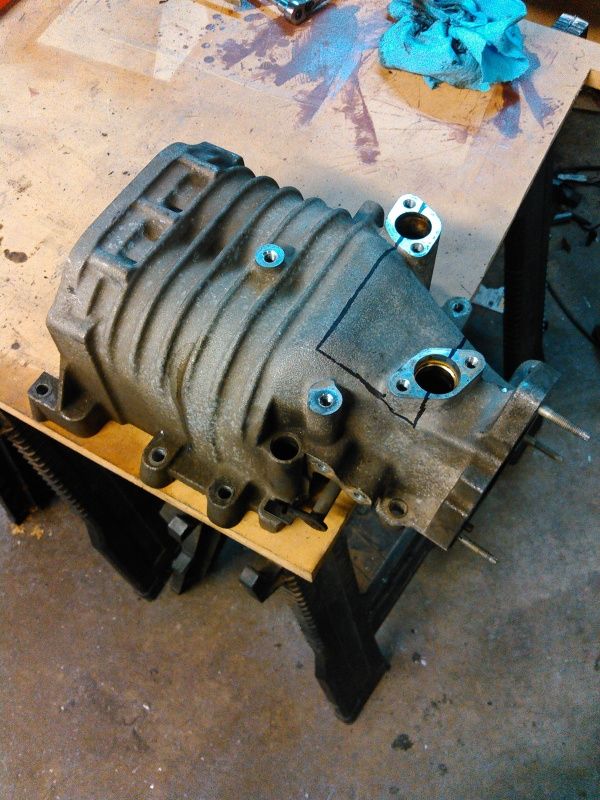
    Those inlets are too small-6mm. And it's a 4-pass core, instead of the 2-pass that I thought I was getting.

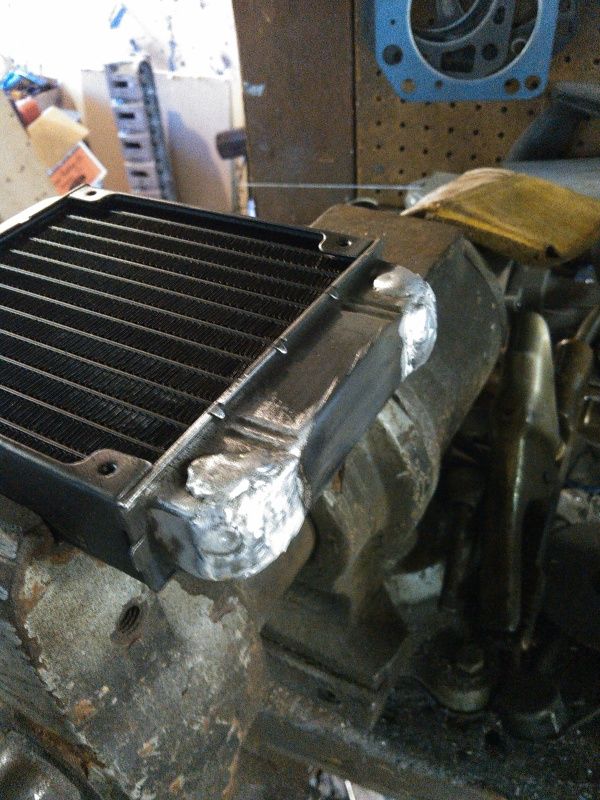
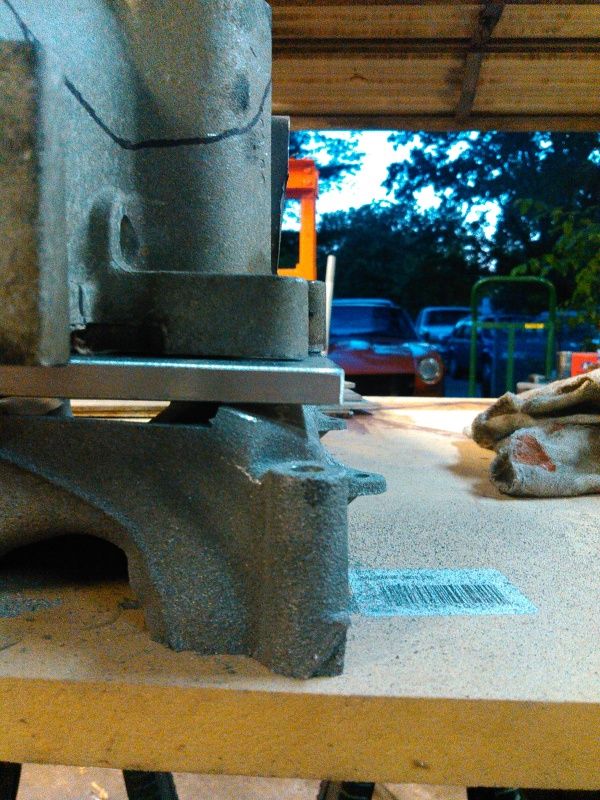
    So, fix the inlets...First thing is to close up the old holes and weld a thick pad of aluminum that I can either drill and tap, or weld a tube onto.


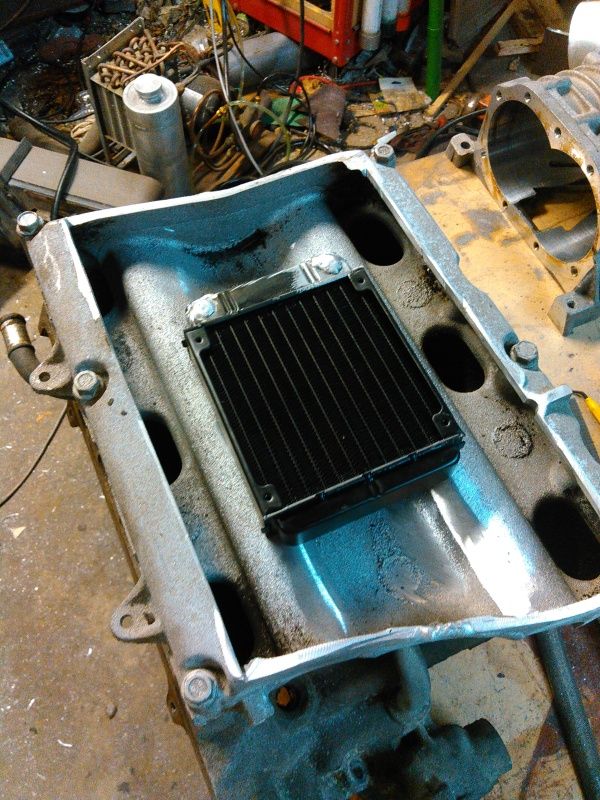
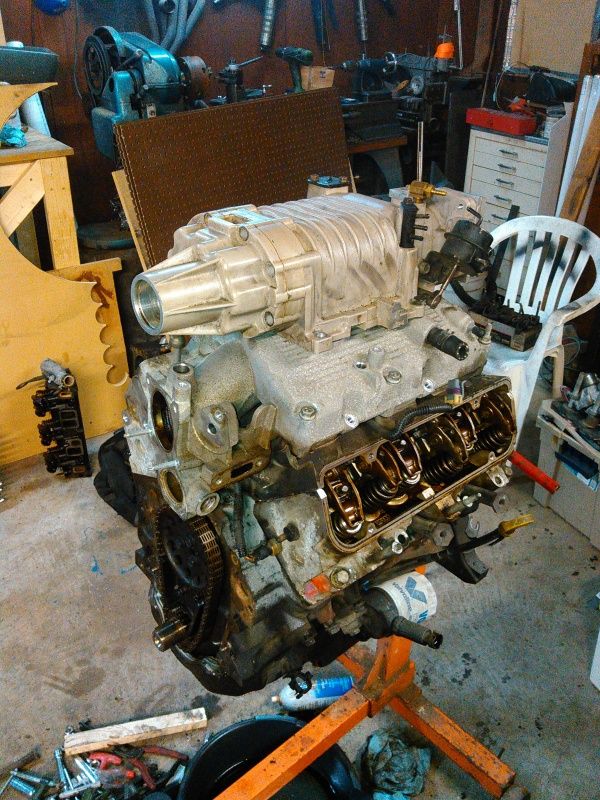
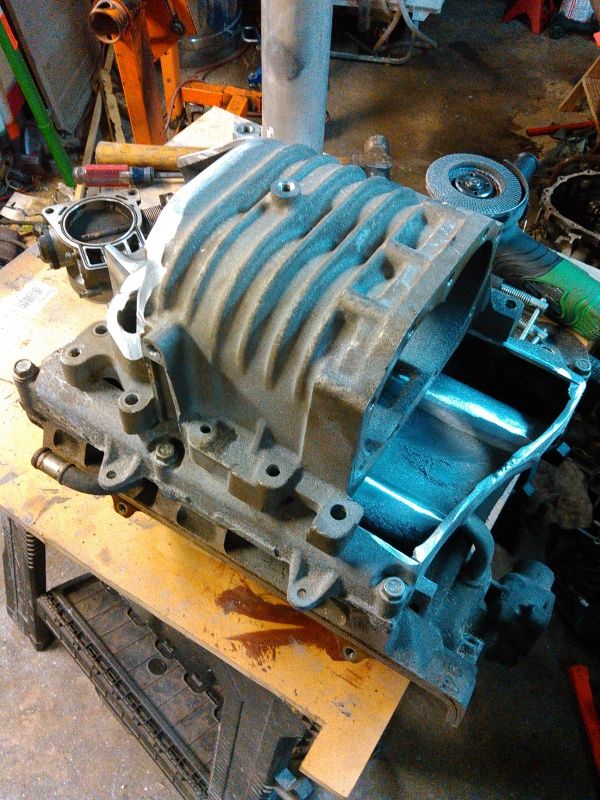
    Checking to see how it fits down in the lower half-If I raised it up 5/8" of an inch it will fit absolutely fine. I am pretty sure I know how I'll do this now. Gonna be a lot of drilled and tapped holes...


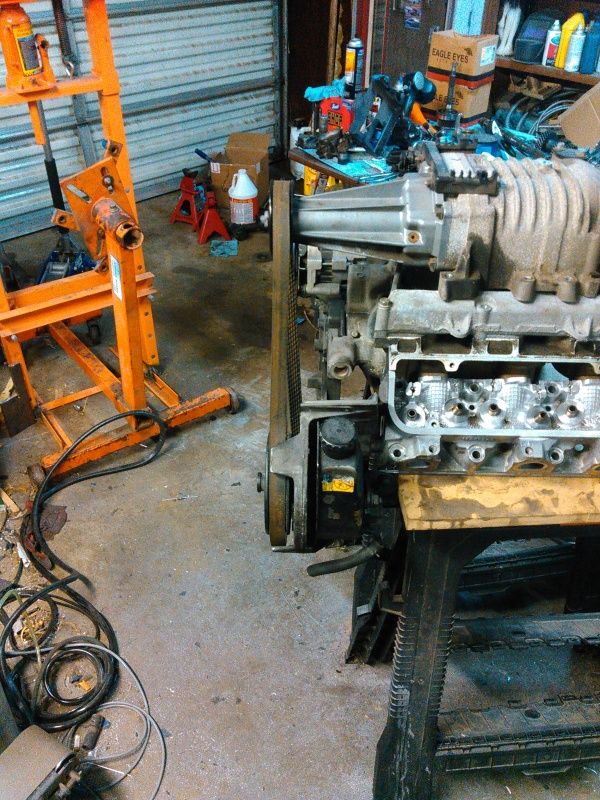
    Had to pull the header jig off the temporary work table so I could mock up the belt drive-I can easily get the supercharger into place where the factory nosedrive will line up. I am VERY tempted to just make a pattern and pour a new casting, that will accept the supercharger mounting plate. This will let me use a bolt-on plate and for FWD or transverse mounted engines, and an un-modified supercharger could be used. For longitudinal applications, though, there isn't any room without chopping up the firewall. The supercharger case would have to be modified.


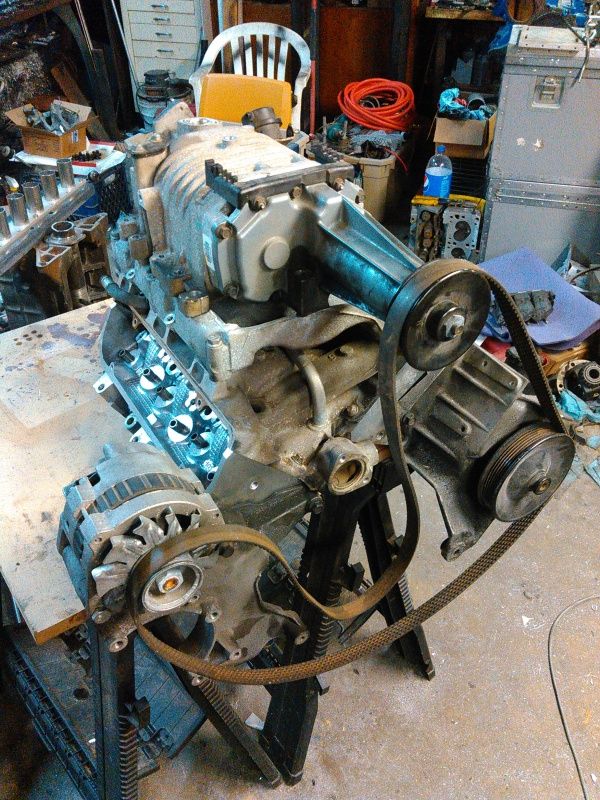
    Using the CamaroBird water pump means I may either add an idler pulley before going over the power steering pump, or have to modify the power steering pump bracket to clear the belt.


    I did yank that bypass pipe out today. It just isn't going to work for what I need it for and I'm using the CamaroBird bypass in the engine block, all that pipe does is recirculate water to the inlet of the water pump until the engine warms up-basically a thermostatic bypass. Once the engine is up to temperature and the main thermostat starts to open, the bypass pipe gets closed off and forces all the coolant to run through the radiator. This speeds up warmup times and gets the engine into closed-loop faster, which means lower emissions.

    I will have to drill and tap for the heater hoses, I think. Does anyone here have handy notes on getting the heater hooked up in an S10 truck? Should just be one hose from the water pump, and one hose from just behind the thermostat, I would think...

    Also just realizing that while the camaro accessories will simplify belt routing, they also mean giving up the clutch-driven fan of the S10, because it doesn't line up. That sucks. That engine driven fan just will NOT let the engine overheat, no matter what. I do have a Volvo 960 Turbo 16" 2-speed electric fan, though, so and it moves serious, serious air. It had to, to pull air through the A/C core, intercooler, oil cooler, and radiator on the volvo.

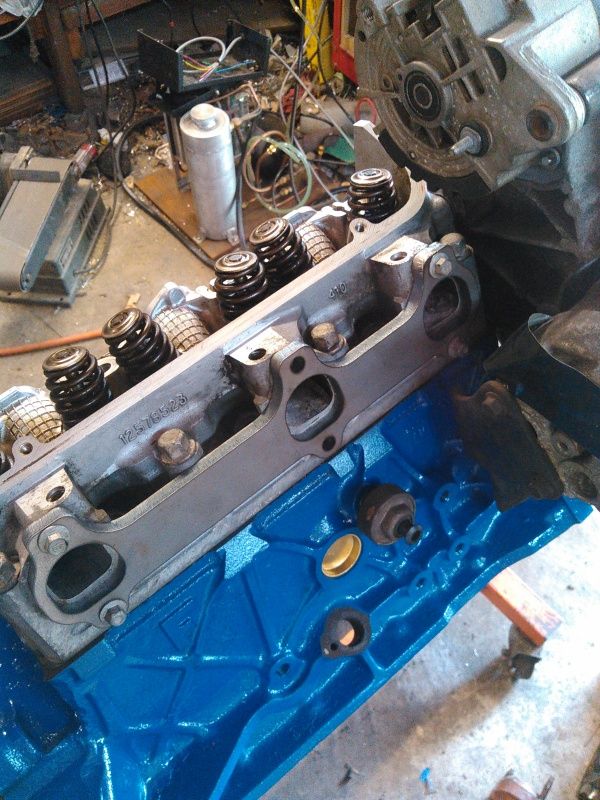
    Next on the list of things to fix is the temperature sending unit for the dash gauge. The iron head and aluminum gen2 engines have a port in the corner of the cylinder head, and the computer pulled temperature from the thermostat housing. I am planning to fit the stock 3500 temp sensor in the thermostat housing, and the gauge sending unit will most likely be another stock 2-pin sensor installed into the stock 3500 location. I am under the impression that the transfer curves for the two sensors are identical, GM uses the same sensor for oil temp, water temp, intake air temp, etc. Only difference is the two pin sensor needs one pin grounded to the block for the gauge to work.
    Last edited by Xnke; 08-01-2015, 12:55 AM.

    Leave a comment:


  • Xnke
    replied
    The intercooler core showed up today, so I'll have a go at fitting it. I am not sure how to make it removable, though, in case it needs replacement. That is going to be tough.

    More supercharger case re-working tonight. This is where I started out, getting a 75mm tube out of the side of the super.


    Now I gotta close up the back end, get it all sealed up. I missed a porting shot, minimal porting was done, just smoothed out the short side turn as best I could.

    Added some gussets, then added a bunch of filler to get material to smooth out the turn:


    Getting the back panel closed up, and trimmed up the gussets some:


    Little bit of a whack with a hammer, it's 0.120" thick aluminum sheet so the hammer marks will get planished out before the sanding starts:


    End result for the night-about 60% welded. Still have the tough work to do in the morning, and then I have to hunt down some new case bearings. INA, the manufacturer of the bearing, is under a lot of pressure from Eaton to not sell them anymore. They *can* be had, though.


    I need to get some more work done on Derek's headers (The Raven knows...) before I get much more into this.
    Last edited by Xnke; 07-31-2015, 12:41 AM.

    Leave a comment:


  • robertisaar
    replied
    Originally posted by The_Raven View Post
    Glad to see you made it over here....
    X2, for such an off-the-wall build, it would suck to not have the community that can appreciate it the most not see it.

    Leave a comment:


  • Guest
    Guest replied
    Glad to see you made it over here....

    Always a fun way to build something... "Well I have this, and I have that, I can make this work!!"

    Glad to see you heeded my advice and went with a newer top end than the Gen2 stuff.

    psst Six_Shooter from hybridz/gearhead-efi.

    Leave a comment:


  • Xnke
    started a topic You guys might like my new truck engine

    You guys might like my new truck engine

    Figured you guys would like to see this one. I have a 1991 S-10 truck, with the 2.8L V6. I started out with the intent of just swapping the Fiero valve covers to stop the valve cover leaks...then I wanted A/C that worked without having to screw with the compressors all the time...

    Then I grabbed a 3.4L Camarobird engine, wiring harness, and OBD1.5 computer for 140$.

    Then I got given a pair of genII alloy heads.

    Then I grabbed a complete 3500 top end for 140$.

    THEN I was re-arranging the "Shelf Of Power" and had to sit an M62 supercharger somewhere while I arranged the stack of M90s and re-located the pile of turbochargers so they didn't fall over on the intercooler cores. (Yes, this is a problem.)


    Sooo, this is where it's at now. RobertIsarr has been quite helpful with the computer side of things, tuning isn't new to me but this system is quite different from what I am used to working with.

    I will be using the Camaro accessory drive as it nets me a little more room where I want it, and lets me use the newer style A/C compressor. Has a Convenient place to bolt up the coil pack, and generally is usable. There are some modifications that have to happen to make this work, though.

    Headers have to be made:


    Power Steering brackets need to be modified:


    And the intake manifold needs a little work:


    The supercharger needs some re-arranging as well. I'm still working on that bit.


    ...Good enough.

    Still need to buy header tubing, get the cam reground, make pushrods, and get the intercooler fitted into place. Throttle is off of a Northstar, it's a little bit of a tight fit but it'll work fine.
Working...
X