Announcement

Collapse
No announcement yet.

Remote bridge rectifier for alternators

Collapse
X
 
  • Filter
  • Time
  • Show
Clear All
new posts

  • Remote bridge rectifier for alternators

    I wasn't sure where to post this but it's pretty universal in application and right now I am in the planning stages of rewiring my car. I figured I would post up what I know about installing a remote bridge rectifier and see if anyone else here has experience, interest, or comments on the subject.

    I first got interested in this a good 15 years ago going to tech for electrical trades. Alternators put out alternating current and you can tap directly into the windings of an alternator and run that power through wires to a remote location. I think the main advantage of this setup was that the higher voltage of the AC could be carried across a smaller conductor and have less issues with voltage drop than if you convert power power to 12VDC and then send it on a long run. Similar in approach to how power is generated at a station, dropped down at a substation and then stepped down further to be used in houses.

    A while ago I came across something online that renewed my interest in this. http://www.alternatorparts.com/quick...rectifier.html On this site there is a pretty good explanation of how it works and the benefits. Down the page a bit is a video of how to attach his product to an alternator and set it up in a car. It is easy to see the setup is nothing more than a pre-wired bridge rectifier in a project box with a fan that comes on with a switched ignition power source.

    The main benefit I am after is splitting up the load across more diodes to increase efficiency and more importantly longer life expectancy and redundancy. I want to add a second point of power conversion in my trunk for when I relocate the battery. I'm not expecting to have any outrageous loads, but I am going to be running a computer with a power supply made for use in cars (it has a wide input I believe is 9-18VDC drawing up to 7 amps) and perhaps a small amplifier in the future. I don't think my power needs warrant getting anything crazy like dual batteries or a high output alternator. I replaced my alternator because it sat around a while and the bearings started to squeak if it was turned by hand. My plan is to simply remove the bridge rectifier out of the old alternator and mount it in the trunk in a small enclosure with a fan and connect it to the battery. Run wires up front to the windings of the alternator and add a switched ignition wire for the fan. Other than tapping into the windings, the rest of the alternator system up front will remain unchanged. I will simply upgrade all of the major ground and power wires, and run a pair of large wires to directly ground the battery to the block and power the starter.

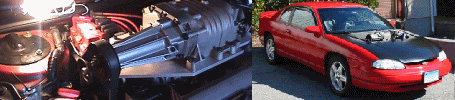
    That's my plan for starting the wiring job on my car. I'm sure I will have a few hurdles to get over when I start installing an OBD2 harness into my 89 Cutlass Supreme. I have removed every single wire from the doors forward and have a harness ready to go in. I have other obligations to attend to as well so the car isn't a major concern, but I am hoping to get the wiring worked out this fall season. I thought I would post this up here to see if anyone has done something like this, used the kit above, or any other expanded wiring setups such as dual alternators or batteries on a 60* application.

  • #2
    do you plan on using a higher output alternator first then using this unit ? I can see the benefit of this for audio systems so other specialty item or if you want to run a electrical item at a remote location where this is no power Just keep in mind you will be creating more heat when tapping (hence the cooling fan in the rectifer) but also in the alternator it self , keeping that cool will also be a benefit to longevity of the setup.

    Comment


    • #3
      I will be using a larger alternator than what my car came with stock, but nothing crazy, just a U-van alternator. I think its output is 125 amps. The only extra load I am adding is a computer. It doesn't draw much power as I have a program that loads with windows lowering the processors multiplier and voltage. I also am looking into upgrading my lights to LEDs. Rather than using resistors which would still allow a fluctuation causing flickering lights, I want to buy a couple voltage regulators that allow a wide input voltage and output at the voltage needed for the LEDs. Something similar to how the power supply for my computer works. I also might use a watercooling setup on the computer since I live in Florida and the heat would probably fry the computer if I use air cooling alone.

      I'm not worried about overheating the rectifier. I have leftover heatsinks from old computers as well as fans that I can rig up to combat any cooling issues. I will probably set up all of the added electronics in the trunk. I'm moving my battery back there and will section everything off so things rolling around in the trunk don't mess with it. I might even mount the rectifier under the car so it doesn't add any more heat back there with the computer.

      As for the Alternator, it should run COOLER with the extra rectifier than without. Since I am not modifying the voltage regulator in any way, the amount of energy created at the alternator will still be the same under a given load. By giving that energy two different paths to follow I am reducing resistance to the system. Similar to running parallel resistors or dual exhaust. Splitting the load will reduce the amount of energy going through any one of them for a given load, which means they will be running cooler. Heat affects their efficiency. So to give some made up numbers, lets say at 80*C they are 80% efficient and at 60*C they are 85% efficient. By using this setup to lower temps my arbitrary numbers would yield 5% more energy in the form of electricity instead of being burned up as heat. I'm sure if you hunt around online you can find info like this on computer power supplies. Higher end models will have efficiency ratings at a given temp, and the more you load them up the more they start to waste energy as heat.

      The other positive to this is that by using 2 of the same rectifiers designed to handle these loads it acts as a back-up. If one of them fails the other would pick up the slack. Since the loads I am adding are not outrageous I probably wouldn't even notice anything happened. I'm sure someone with a large sound system would probably see their lights flicker with the bass, but they wouldn't be immediately stranded and would be able to take it easy on power consumption until they work out what went wrong. After thinking about it for a while and coming across that preassembled device I linked to above, I figured I would start a thread here to see if anyone else had used something similar or looked into it. I have no problem jumping into it blindly so when I get it set up and running I will post up results. I'll probably have the wiring done by the winter but I doubt I'll get the engine in and running good till early next year.

      Comment


      • #4
        Sounds like an interesting idea, but dont forget about the 1.4v loss on each side. But how much ac voltage does a bare alternator put out? I guess it would obviously vary with rpm. And how many phases? If its polyphase you couldnt' use bridge circuits, You'd have to use individual diodes for each phase. With the large current flow of an automobile setup you would have to use massive diodes. I Used to use 50amp bridge circuits to make simple dc power supplies. They were the type with the hole in it to bolt on a heatsink. You'd also need capacitance to smooth out those sine waves better.

        I wonder if running wiring throughout a vehicle at high ac voltages would induce noise in alot of nearby circuits. I imagine the frequency would be right in the range of audible noise.

        Awesome idea tho. Very geeky, right up my alley

        Comment


        • #5
          I had considered using separate pieces to set it up but it's really not worth the effort for what I'm doing. Using car parts that have already been engineered to work on cars and capable of working with the amps I am putting out is all I need. I have an old alternator with bearings that are on their way out and I'm just going to use those parts. The main object of this project for me was to do something cheap. Buying a prebuilt system or buying new parts to design my own defeats that purpose. Although if this works out well enough I would probably invest in some new alternator parts for future builds.

          Alternators are wound 3 phase and from what I understand they can go over 100 VAC unregulated. The alternator will burn out in a matter of minutes with full power to the primary windings. The voltage regulator adjusts how much power is applied to the primary windings based on the voltage it receives. It is calibrated to a certain voltage (the website above mentions certain foreign manufacturers having different voltages) and the lower the voltage is from that preset, the more energy is applied to the primary windings. The stronger the electromagnetism, and faster it spins, the more energy it creates. I would imagine slow speed with high magnetic field produces more amps at a lower voltage, and faster speed with lower magnetic field would be lower amps and higher volts. The voltage regulators ability to change given the needs of the system and speed of the engine helps regulate fluctuations of voltage.

          As long as the AC wires are kept together there should not be any significant field around the wires. The important part is keeping them together. I remember from going to tech for electrical that you NEVER run power in one way and out a different path through metal because of inductance. According to the website I linked to earlier, the main cause of alternator noise is from the rectifier. The high voltage essentially hitting a wall as it is directed through the diodes causes a lot of RF noise. The more diodes this load is spread across the less resistance to the system and less RF noise created. This also helps with reducing heat and increasing efficiency as more electricity gets across the diodes instead of being turned into heat by resistance. The more power reaching the DC side of the system will be noticed by the voltage regulator and reduce the amount of power needed on the primary windings. If a large load on the alternator takes HP away from the engine to be driven, then a reduction in load would free up HP, albeit by a very small fraction.

          I'll admit I am more into the electrical side of things than the electronics, so my terminology isn't 100% precise. But electricity does have some fundamental values. An electron works under the same principles singularly as they do in large quantity. I found a website with an easy to follow explanation of converting AC to DC here - http://www.allaboutcircuits.com/vol_3/chpt_3/4.html It has some well drawn diagrams explaining multiple setups.

          I wish I had money to do something more exciting like pick up an LY7 from the junkyard, or start getting serious about melting aluminum again to try and make some new parts but that's just not happening right now. I had dumped a lot of money into a 3500 swap for my mom's van and no one else would put any money into it. Once the trans started going and my mom found another car for practically nothing, I ended up with the van in my back yard. It seemed like an interesting and cheap project to take all the parts I put money into on that beast and upgrade my old car. I already invested in a reman rack, tie rods, ball joints, coil overs up front, and a brake upgrade in the rear. I still have to do the coil over in the back and a little body work as well as a new trans so that eats up my budget for a while. Since I have the wiring stripped out I figured I would entertain any upgrades since I have a ton of wire and parts laying around.

          Comment


          • #6
            All car laptop charger are built for voltage swing and have lard capacitors in them to cover spikes.

            96 Z34 3.4 SC DOHC Getrag, 284 5sd manual transmission, stage 3spec clutch, 97 engine, 97 pcm, S3 intercooler 1 of 1 Roots SC LQ1 in the world 8.5 psi.

            Comment


            • #7
              To be honest I am not a fan of laptops. I'm sure a laptop charger can be cannibalized for other automotive uses, but for my goals I have a piece of hardware that fits my needs.

              http://www.mini-box.com/M3-ATX-DC-DC...8&category=981

              I really like how well this power supply works and has customizable settings for shutting down. You can run the on/off switch through the power supply to let it control the delay between ignition off and when it shuts down, or you can power on and off like a regular computer using a switch connected directly to the motherboard. It is low power in the world of desktop computers, but it allows me to use nearly any motherboard that can be powered on less than 125 watts.

              I am currently typing on a NF61S socket 754 motherboard measuring roughly 9.6" X 8.2" using that power supply. I even have a relatively low power PCI-Express video card installed, extra cooling fans, and a USB powered light all using that power supply and a laptop-like A/C to D/C converter. With the processor underclocked and undervolted it doesn't even make the fan kick in on the converter. I can turn it all the way up and play videos in HD and haven't seen any power issues. I like the fact that I can swap out different desktop hardware and use it in a portable setting like my car. I don't have any need to have a computer or communication at my side at all times so laptops, smart phones and such would be a waste of money for me.

              I build computers for friends and end up with their old hardware. That allows me to upgrade 'point of use' computers for free. Other than the power supply I am using, this entire computer was spare parts. I have another one in my workshop with a car amp powered by an old power supply, and plexiglass over a flat screen monitor so I can listen to music and use the computer for saving and using information for building things, which brings me to the main reason I want to use computers when I am away from my desk - Google SketchUp


              http://sketchup.google.com/intl/en/product/gsu.html


              I'm sure different people will have different preferences when it comes to 3D modeling, especially if you have used other programs or do it professionally, but this is the program I have been messing around with lately. I don't have any experience with other programs and this one was free, so after hearing a number of people on woodworking websites talk about it I decided to try it out. Contrary to the 'intuitive' description on the link above, many of the operations used are no where near intuitive. You can spend hours trying to get a few operations done if you don't know what you are doing. The tutorials they provide are somewhat helpful, but they use hotkeys to perform operations. That is great for someone who is familiar but you don't have a clue of half the things they are explaining when they say 'just do this' and can't see what hotkey they just hit or it's onscreen equivalent. Then a few of them show off creating something intricate in a matter of seconds which would take you days to figure out without any prior experience with the program.

              However there are much better tutorials to be found. If you have a specific interest such as woodworking, metal fabrication, or architecture then you can find websites specific to what you want to do and tutorials to help you learn how to create things common to your area of design. There are also some great tutorials on youtube, like one where they go through a 'SketchUp for Dummies' book. Once you learn and use certain functions several times you can easily move from taking hours at a time to minutes for creating what you want.

              It is definitely an investment of time to learn but the program is free and there is an online repository so you can look at what other people have already made and modify to suit your needs and share ideas. If you are working with expensive materials or have to build multiple copies of something accurately then it is really handy to use. You can modify the model and not waste materials. One of the best parts is you can go back to the model and use the measuring tape function to check distances between parts from any point on those parts. You can also figure out angles from intersecting lines and make sure all parts fit together instead of building from scratch and finding there isn't enough room for the parts to work together. The professional version of SketchUp does cost money but really only adds functions most people wouldn't need outside a professional setting. It's a great tool I need to make more use of in the future, and anyone interested should check it out.

              Comment

              Working...
              X