Announcement

Collapse
No announcement yet.

Hello all 60*ers

Collapse
X
 
  • Filter
  • Time
  • Show
Clear All
new posts

  • Weatheralls Auto
    replied
    Lol, no that is the main harness for the engine lol. (you can see the pcm connector there on top by PS Pump)

    Little tough to do out of the car and with out car in front of me (stored away)

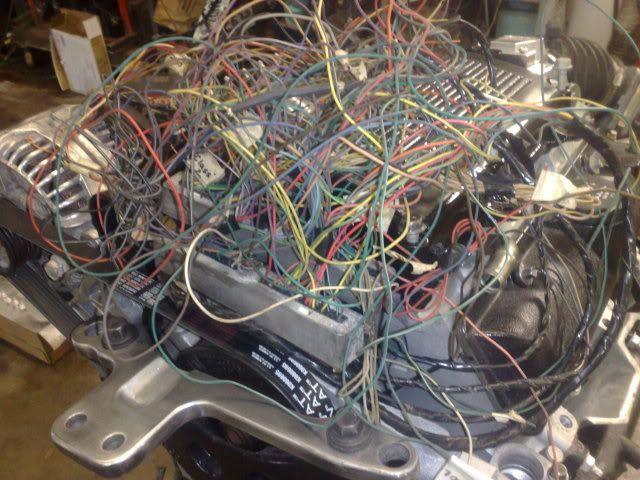
    The harness will be a Hybrid lol,
    Part of the 2006 SV6 3500 harness mated to a 2001 3400 Impala that is spliced into a 2002 Jbody 2200 that is then connected to a 2000 Jbody 2.4l!!!!!!

    No wonder I have a headache lol.

    Was busy yesturday so not much done, went to stay late and quickly ran out of shrink tube so wont get back at this till next week

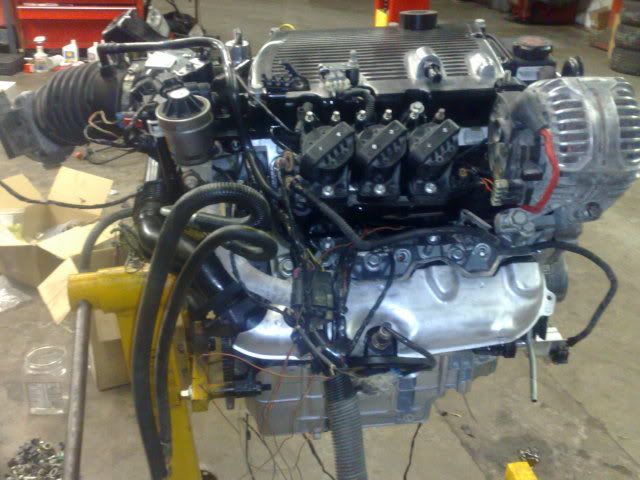
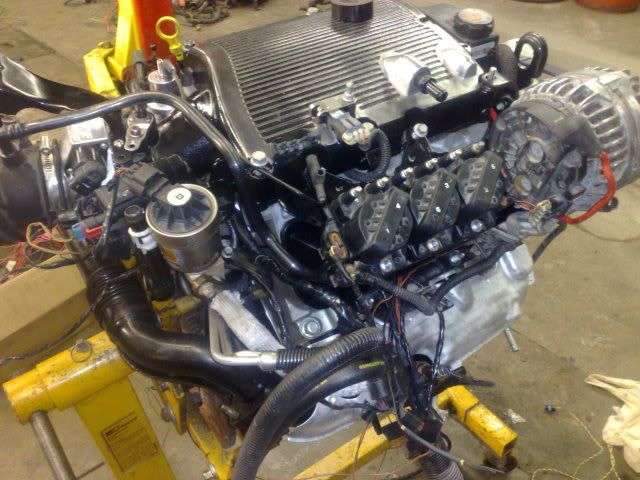
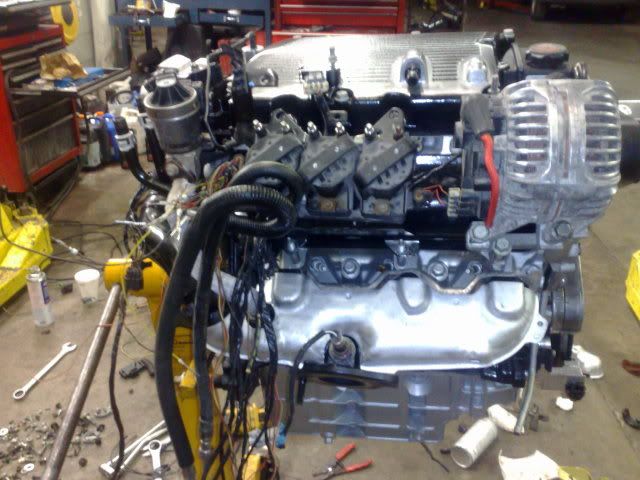
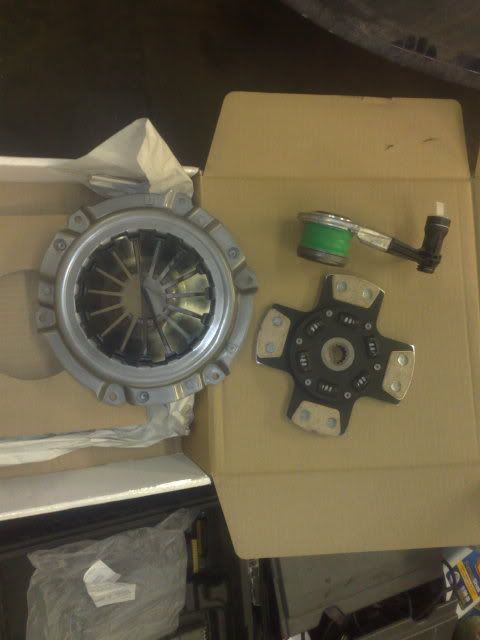
    Couple Pic updates, starting to look like a harness again.


    .

    Leave a comment:


  • Schmieder
    replied
    Originally posted by robertisaar View Post
    i know that sight... nastified TB plate...
    That damn EGR!

    Originally posted by planethax View Post
    Anyone know where that light green wire goes?

    LOL


    JK
    HAAAA! What a nightmare. What did you do? Throw a junk mess on top for laughs, lol?


    Hey Planethax, nice pics! Good luck buddy.

    Overwhelming moments, oh man do I know that feeling all too well. But, as you said, all it takes is to step back and think it through. That is how I solve most of my issues that arise. That and post questions here, many smart posters here. This website is a 60* blessing.

    On the picture note, I have several photos on my camera. I don't have my upload cable with me. Once I get home I will upload and share. But firts things first, I have to go to the hardware store.

    Here is a frustrating issue, my oil feed flange snapped at the neck and the one end is stuck in the -4 an braided hose. Either I have to buy a new hose complete or get a new hose end, cut and attach. I hope hardware sells -4 an hose ends, but I think that might be an I-net order, sigh.

    So close to my first start up, and I have to deal with this issue. Though, if it was easy, everyone would have a turbo. The honor of a successful custom build, the hard work pays off.
    Last edited by Schmieder; 02-25-2010, 07:44 PM.

    Leave a comment:


  • Weatheralls Auto
    replied
    Originally posted by robertisaar View Post
    i considered it, but i am a bit colorblind and i see about 20 "green" wires minimum.

    All of them lol.

    I am getting there.
    Since most everything like Pcm needs to be relocated, it is taking quite some time as I am not wanting to extend every wire.

    More splices more chances of failure lol.


    Leave a comment:


  • robertisaar
    replied
    Originally posted by pocket-rocket View Post
    Yeah, but there should only be one "light green", which would be easy to spot on a wiring diagram At least I was partially right, lol.
    oh, you're right, but i see 4-5 "Light green" wires.

    it's a PITA...

    Leave a comment:


  • pocket-rocket
    replied
    Originally posted by robertisaar View Post
    i considered it, but i am a bit colorblind and i see about 20 "green" wires minimum.
    Yeah, but there should only be one "light green", which would be easy to spot on a wiring diagram At least I was partially right, lol.

    Leave a comment:


  • robertisaar
    replied
    Originally posted by pocket-rocket View Post
    That's good stuff, lol. I would actually expect Robert(Isaar) to really look it up just to see what it's for, lol. I would but I'm way too beat to even think about it.
    i considered it, but i am a bit colorblind and i see about 20 "green" wires minimum.

    Leave a comment:


  • pocket-rocket
    replied
    Originally posted by planethax View Post
    Anyone know where that light green wire goes?

    LOL


    JK
    That's good stuff, lol. I would actually expect Robert(Isaar) to really look it up just to see what it's for, lol. I would but I'm way too beat to even think about it.

    Leave a comment:


  • Weatheralls Auto
    replied
    Anyone know where that light green wire goes?

    LOL


    JK

    Leave a comment:


  • Weatheralls Auto
    replied
    Injectors should be here tomorrow, almost done with the wire Harness, so will be able to tuck the wires away and button up the engine!!!!

    $0 more days till Install begins.

    Leave a comment:


  • Weatheralls Auto
    replied
    Pics of something else that showed up today

    .

    .

    .

    .

    .

    Leave a comment:


  • Weatheralls Auto
    replied
    That is my sons work (he is 14) he used a scotchbright pad to smooth the top out, then painted it, then wet sanded 400 to 2000(raised areas), then painted it. then started the wet sanding again then clear coated it.
    He did the upper mount bracket as well.

    He is enjoying it and it keeps him off the streets lol.

    Leave a comment:


  • asylummotorsports
    replied
    Don't forget the locktite on the crank trigger!!

    Just trust me!

    Leave a comment:


  • ForcedFirebird
    replied
    Interesting design on the plenum. Did you sand the top, then paint it?

    Leave a comment:


  • Weatheralls Auto
    replied
    Yes the old Plate was disgusting!

    It did NOT come of my engine though, came from an Old Venture vaan here as I needed the Shaft.

    Leave a comment:


  • robertisaar
    replied
    Originally posted by planethax View Post
    i know that sight... nastified TB plate...

    Leave a comment:

Working...
X