 Tweet
Tweet
Unbolt the coolant line from the rear head and pull the heater return line out of the lower intake manifold.
-
Ben
60DegreeV6.com
WOT-Tech.com -
Okay, I did remove the coolant line that connect to lower intake manifold. I try again. Again nothing. Man, it seems they seal INSIDE or something. It is getting silly. Man, I wish I could do that myself in 3 years ago but I have 1 car. I really need car so I let dealership fix it and I borrow my dad's car. Since I have 2 cars so if I have other car then I will fix it myself for sure since they look very easy to work on it. Bummer because nothing can I do about that in 3 years ago.
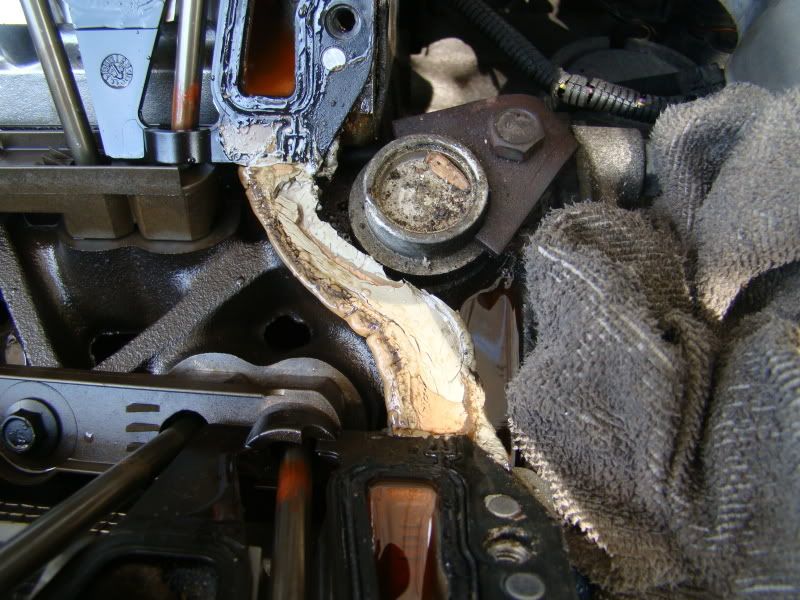
Now everything is out of way for lower intake manifold. Only 1 problem is seal which they are probably inside that I can't reach.
*edit* I try my new way. I use small razor knife which it can reach under lower intake manifold. ALMOST WORK but still can't get it out. It was little tiny moving from lower intake manifold to plastic gasket to bottom. I pull hard as hell but nothing yet. Now my both arms are sore lolLast edited by palsut; 07-26-2009, 11:10 AM.
Comment
-
Oh man that's tough job I ever had. lol Thank god for not deal with lower intake manifold anymore. I'm not quitter. I want to get it out and work hard as hell. SappySE107 told me (private message) use wood block on valve cover to hammer it up but I got light bulb on my head after figure it out. How did I do that?
I put the wood block on LIM where steering wheel pump is. I push the wood down with my both hands hard as hell. It is FINALLY LOOSE!
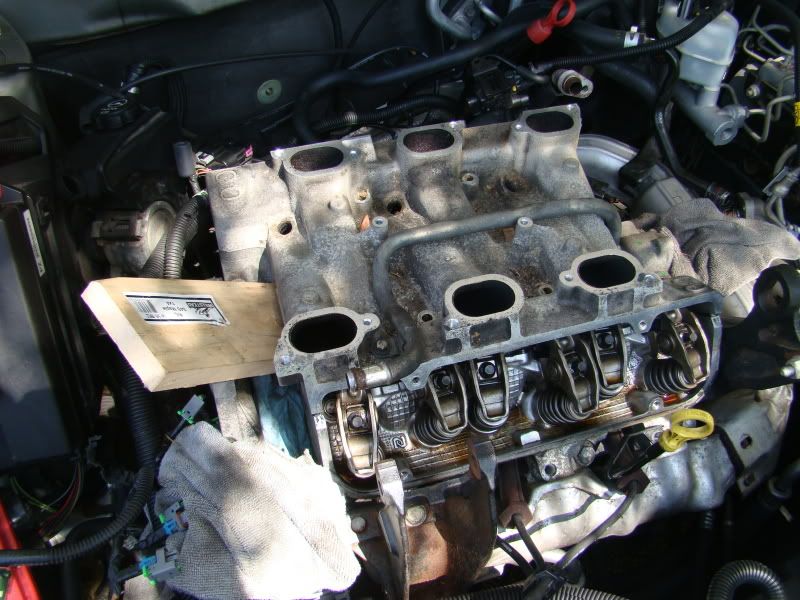
Dude where is my LIM? lol
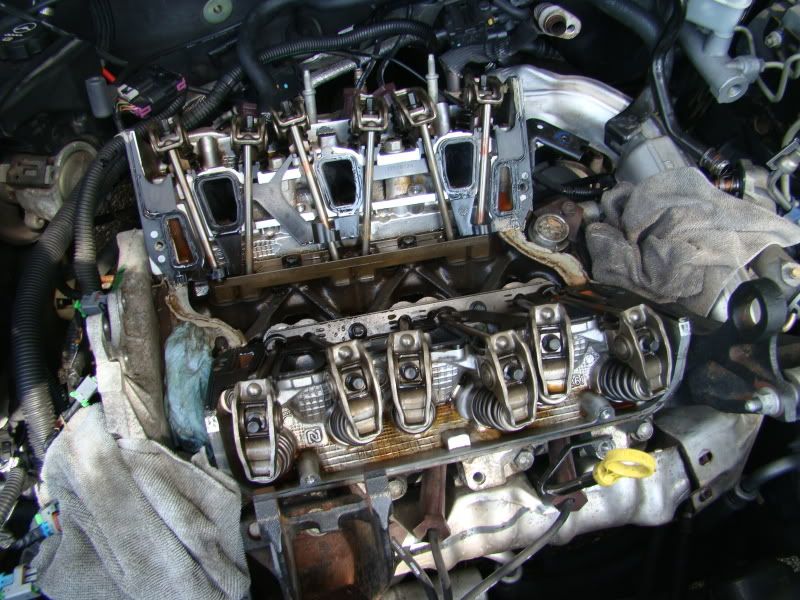
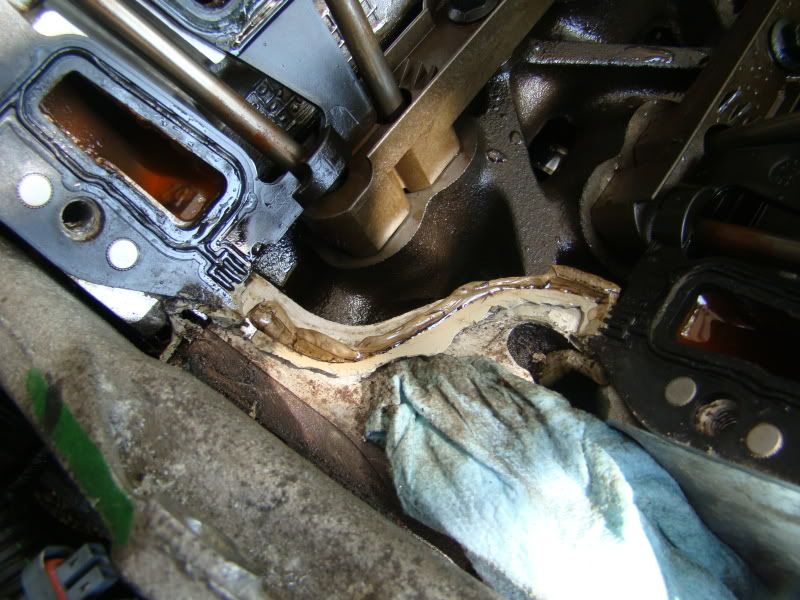
HUGE SEAL... no wonder why I can't get it out. I was right. It was seal inside. Thank to small razor knife and wood block for work it out today. Did I see other bad gasket again? Look like to me.
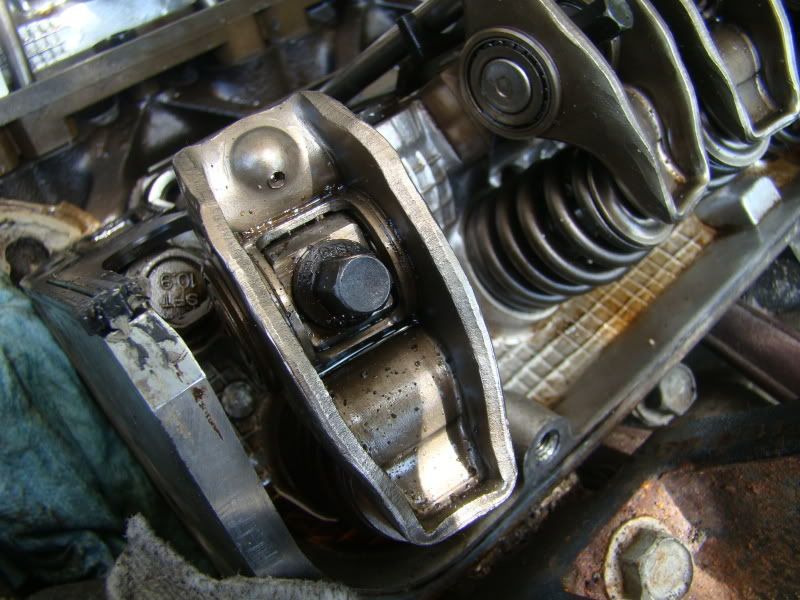
Pushrod bolt. Now, that's worse nervous part to work on it because I don't want break it or blew the engine up. It was 8mm. I don't have big tool for 8mm. All I have small tool but still won't move out after I try that.
I hold it later because my arms are very sore. Time to stop and watch Brickyard 400 for break time lol
Mostly important thing that LIM is gone so I will give that part to SappySE107for get a new LIM.Comment
-
8mm socket, 1/4 ratchet, and an 18mm or so wrench or pipe to extend on the ratchet. Shouldn't be on there too tight. If you do the rockers that aren't pushing the valve open, you won't have to fight against the spring pressure. I have read some guides that explain to rotate the crank so that there is no lift when you are installing the pushrods as well, to get an accurate torque reading. There is also a fear of stripping the rocker bolt holes in the heads when you torque against the spring pressure.
Glad you got it off Ben
Ben
60DegreeV6.com
WOT-Tech.comComment
-
Looks like that sealant is like liquid nails and not RTV? LOL damn.
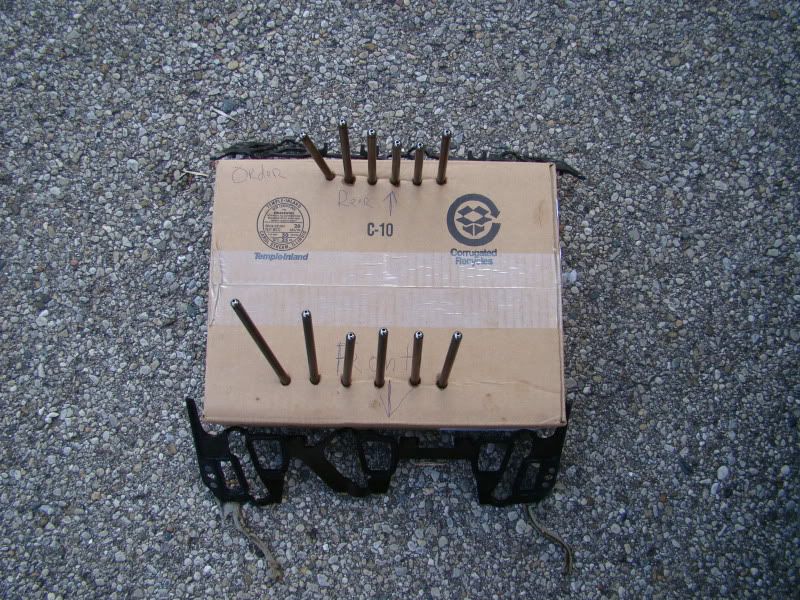
Don't mix up push rod order.sigpic New 2010 project (click image)
1994 3100 BERETTA. 200,000+ miles
16.0 1/4 mile when stock. Now ???
Original L82 Longblock with LA1, LX9, LX5 parts
Manifold-back 2.5" SS Mandrel Exhaust. Hardware is SS too.
Comment
-
So what kind brand I should get for RTV? Should I do that same thing like dealership did? lol
I finally found my 8mm socket for big tool. It was INSIDE of 3/4 socket. No wonder I can't find darn thing. After sort all socket in order until I saw 3/4 socket and find little bastard 8mm socket inside. lol
Of course I always put it on order as it is important to do that.
Now plastic gasket is out.

While pull pushrod bolt out from my tool. The car was shaking little bit. Should put back up e-brake on. It was spit out where small gasket on side that have coolant on it. Do I need clean that coolant out or it will be fine?

Well that's it. Mission Completed! Now, I will see SappySE107 tomorrow for get metal gasket and new LIM. On Tuesday, I will get my upper intake manifold and valve covers from UPS. I guess it is time to spit the secert out.
There is my new look.

It is going to be killer look when I install everything back.
About pushrod. All I need keep them straight and torque them that would be fine? Just want to make sure because I don't want risk it on my engine.Comment
-
wow, you sure you don't want to powder coat the lower to match? The local place wouldn't have been able to do it quick enough....but damn! Those are SHINY! haha. Very nice. Did you sand the upper down first or what? I know it can't look that smooth without some work first.Ben
60DegreeV6.com
WOT-Tech.comComment
-
Nice!!!!!
Clean up all the coolant spill you can, after assembly and the RTV has cured, start the motor for a few mins then change the oil.
Rockers use a torque wrench and tighten to the right torque rating.sigpic New 2010 project (click image)
1994 3100 BERETTA. 200,000+ miles
16.0 1/4 mile when stock. Now ???
Original L82 Longblock with LA1, LX9, LX5 parts
Manifold-back 2.5" SS Mandrel Exhaust. Hardware is SS too.
Comment
-
So you can do powder coat? If so then how much it will cost me? Actually, I send it out to guy in Kansas. I ship that part like early June. Yes, it was FOREVER to wait. I bet it is lot of work for that but it is worth it to wait as long it is look good. I was grand prix member on other site. This guy is doing 3800 engine polish for supercharger.Originally posted by SappySE107 View Post
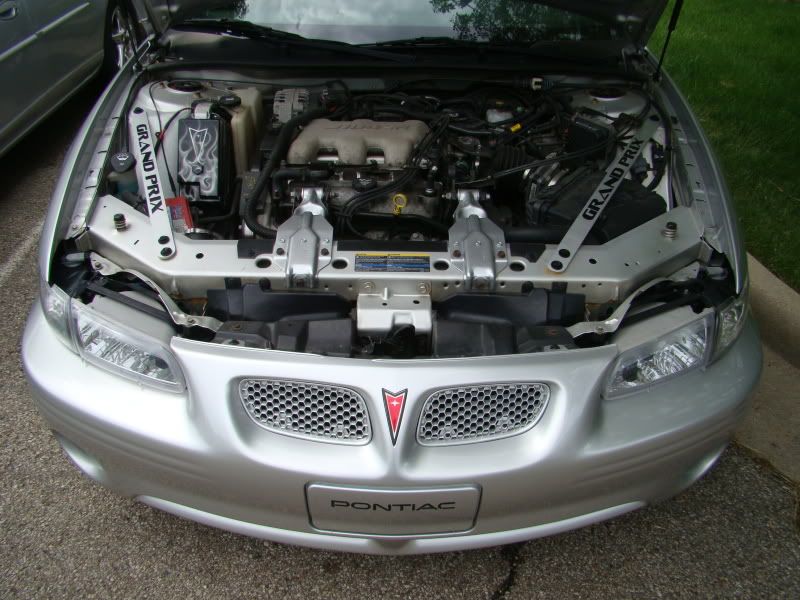
That's my engine look on May 24th before I torn it off. I didn't think about LIM because they are "buried" where upper intake manifold cover mostly of them.
Thank you. Okay, I will clean the coolant out. Lucky, it is not went inside. Oh yeah, I will change the oil after start the engine up. That's come my 1st mind. Thanks for info about torque wrench. I do have one but it is huge tool because it is for my lug nut wheel. I will go store to buy small torque wrench.Nice!!!!!
Clean up all the coolant spill you can, after assembly and the RTV has cured, start the motor for a few mins then change the oil.
Rockers use a torque wrench and tighten to the right torque rating.Comment
-
Make sure it's a good accurate one. Use it for the intake manifold bolts as well (lower and upper) and in the right sequence or it will leak and/or damage things. There is a procedure for doing them. I believe the gaskets give you a sheet with order and torque ratings.sigpic New 2010 project (click image)
1994 3100 BERETTA. 200,000+ miles
16.0 1/4 mile when stock. Now ???
Original L82 Longblock with LA1, LX9, LX5 parts
Manifold-back 2.5" SS Mandrel Exhaust. Hardware is SS too.
Comment
-
-
Craftsman should be accurate enough.sigpic New 2010 project (click image)
1994 3100 BERETTA. 200,000+ miles
16.0 1/4 mile when stock. Now ???
Original L82 Longblock with LA1, LX9, LX5 parts
Manifold-back 2.5" SS Mandrel Exhaust. Hardware is SS too.
Comment
-
Okay great. I will go to Sears to get that.
Valve Rocker Arm Bolt 14 lb ft+ 30�
Valve Rocker Arm Cover Bolt 89 lb in
After see I own Valve Rocker Arm Bolt. How world I get + 30 degree?Comment
-
From the point wrench clicks to indicate the proper torque has been done, then just continue turning the wrench another 30 degrees (what would that be... 5 minutes on a clock?)-Brad-
89 Mustang : Future 60V6 Power
sigpic
Follow the build -> http://www.3x00swap.com/index.php?page=mustang-blogComment
-
Too long, weeks...upon weeks. If I did it in bulk with a bunch of manifolds it would be one thing but 1 off stuff is just too long to even offer. I think you went to the same guy Corey used for valve covers, which is a polish setup and not just powdercoating.
For install, you should put a bead of silicone done (included with the gasket kit), and set the manifold in place. Then, the next day after the silicone has cured more, torque the manifold down to spec (2 part process).Ben
60DegreeV6.com
WOT-Tech.comComment

Comment