Announcement

Collapse
No announcement yet.

My 89 Camaro Project

Collapse
X
 
  • Filter
  • Time
  • Show
Clear All
new posts

  • pocket-rocket
    replied
    Formula 88 is still worth a big search for.

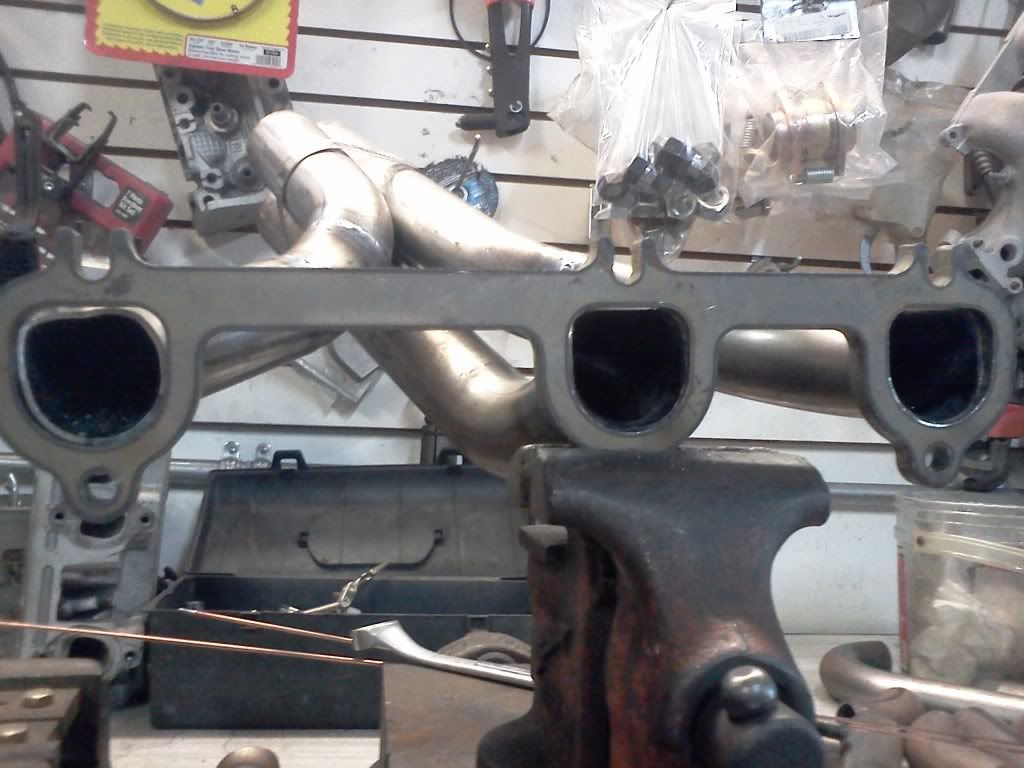
    This is a 96 UIM that was soaked 2 days on each side in Formula 88. No scrubbing, no rubbing, no agitation, no circulation. The real evidence is the carbon line inside the intake because I needed more Formula 88, but Lowes didn't have any more.
    Attached Files

    Leave a comment:


  • Superdave
    replied
    Originally posted by ForcedFirebird View Post
    Clean the cover with? It was tanked in Formula 88 then blasted.


    oh, ok.. if it was just formula 88 then i was going to have to go on a big search for it.. blasted makes sense.


    thanks again BTW.

    Leave a comment:


  • ForcedFirebird
    replied
    Clean the cover with? It was tanked in Formula 88 then blasted.

    Leave a comment:


  • Superdave
    replied
    lol, no problem. A friend of a friend is probably going to do it this week.


    I still have the tap that i borrowed from work for the last one and an extra plug but i just want to be really sure.


    BTW, what did you clean that with?

    Leave a comment:


  • ForcedFirebird
    replied
    Aw man, I could have welded up that hole, and even mentioned it to Ben about the RWD cover having it. I couldn't remember if it was you that taped and plugged it.

    Leave a comment:


  • Superdave
    replied
    Exactly what i was talking about although none of mine were as bad as the one on the left.


    I did actually MIG weld the inside of 2 of the primaries, as John said it left a lot of material and i ended up grinding them out a few years ago. The others just bothered me and i decided to fix them while i had them off.


    Thanks to John i have a fresh 3.4 timing cover, It's getting the extra coolant hole welded shut this week and then hopefully installed this weekend with a brand new water pump. Got a few other things in the mail that should wrap up the front end "remodel" project and then it's back on the road for more tuning.


    Track rentals in May, June and October.. can't wait.

    Leave a comment:


  • pocket-rocket
    replied
    As usual, nice looking work, John. That's why you need to get started on a set of 180* headers for my 92

    Leave a comment:


  • ForcedFirebird
    replied
    Originally posted by 3400-95-Modified View Post
    Do you have the setup allowing you to tack them to the outside and then do a full bead on the inside of the flange and then re-surface cut the flange to make it flat?

    I see that done on many headers and pipes like that.

    Only hard thing to do would be the suface cut on them since with the pipes there it presents an interesting setup to hold.
    I tack them, peen them, then weld the outside fully while having the flange bolted down. As long as it completely cools while bolted, they are flat - even if they warp a little we resurface them on a large belt sanding table. Welding the inside presents issues. If TIG then the flange gets melted away a bit and may not seal at the gasket, or if adding extra material they need to be machined. MIG will build up a lot of material, and have to be machined and maybe even ported some to get them smooth. Also, when welding the insides, there is nothing to keep the flanges from warping, and trust me, they warp a LOT.

    Here's a pic of the hand peen on the primaries, even after using Marc's press-tool the bends don't always go nicely (specially the tighter radii). The primary on the left has only been pressed, the other two got a peen and are ready for final welding.

    Leave a comment:


  • pocket-rocket
    replied
    Originally posted by ForcedFirebird View Post
    On our headers, I weld the outside of the primary to the flange, then use a round ended punch to get them perfect, I like doing that vs grinding out material.

    I'll see about digging up a pic.
    That's the way I saw them done on youtube by a company that does some really nice looking headers.

    They also have a system where they send you tons of pipe fittings and you use them to mock up your headers, send them the pieces of it and they build a custom set of headers from the pipe/fittings you used to mock up with.

    Leave a comment:


  • 3400-95-Modified
    replied
    Do you have the setup allowing you to tack them to the outside and then do a full bead on the inside of the flange and then re-surface cut the flange to make it flat?

    I see that done on many headers and pipes like that.

    Only hard thing to do would be the suface cut on them since with the pipes there it presents an interesting setup to hold.

    Leave a comment:


  • ForcedFirebird
    replied
    Originally posted by Superdave View Post
    [ATTACH=CONFIG]6737[/ATTACH]

    Not on the head, on the header. Pic borrowed from another site but you can see where the primary tube lip sits inside the flange. After using the D shaping tool the pipe didn't sit completely flush with the flange all the way around (worst at the corners of the D). Mine are only welded on the outside edge so smoothing out that lip is no problem.
    On our headers, I weld the outside of the primary to the flange, then use a round ended punch to get them perfect, I like doing that vs grinding out material.

    I'll see about digging up a pic.

    Leave a comment:


  • Superdave
    replied
    Click image for larger version

Name:	lip.jpg
Views:	1
Size:	17.9 KB
ID:	377133

    Not on the head, on the header. Pic borrowed from another site but you can see where the primary tube lip sits inside the flange. After using the D shaping tool the pipe didn't sit completely flush with the flange all the way around (worst at the corners of the D). Mine are only welded on the outside edge so smoothing out that lip is no problem.

    Leave a comment:


  • 2.8/3400 1985 Camaro
    replied
    Originally posted by Superdave View Post
    there was a lip where the primary tube sat inside the flange and some of them were pretty ugly . The transitions are now extremely smooth.
    I hope you aren't talking about what I think you are, because if you are, you just removed your anti-reversion lip..

    Leave a comment:


  • Superdave
    replied
    I fired it up today for a very short time, once with just the mufflers and once with the tailpipes attached. I'd have ran it longer but i didn't have a belt on it.


    It's quieter at idle in both configs VS the old single 3" and the engine seems happier with the larger collectors. I think i may add in some small flex pipes before the X though, the V bands were pretty hard to get on and i don't want my headers to crack from the expansion/contraction. As for the sound.. badass. It does have a weird buzz as the RPM's drop after a rev, i need to investigate that more. Still totally different than my Z24 was with it's TD's, much deeper.


    I weighed both systems, the new system is only 9.5 lbs heavier. Not bad.


    Other things i did this weekend..
    opened up the collectors from 2" to 2.25" and de-burred/smoothed out all the internal welds i could reach.
    Found and welded shut all the pinholes in my headers that i could get to.
    "ported" the head side of the headers, there was a lip where the primary tube sat inside the flange and some of them were pretty ugly . The transitions are now extremely smooth.
    Added in a bung for the 2nd o2 (NB)
    Completely redid the vacuum line routing
    modified the wiring harness to move the coils to the firewall
    Hooked up the crank case evac system
    blasted/painted the valve covers gloss black
    POR15'd the underside of the car after scraping off all the original paint


    Videos will come soon, still working out the accessory drive system and waiting on a new timing cover to arrive.

    Leave a comment:


  • Superdave
    replied
    Yep, the only issue i've seen with them is that the paint is different than the production versions have. Once you weld next to it the stuff just flakes off.

    I'm debating weather or not to blast them clean and re-paint or just to let them go since this car will hardly see wet weather.

    Leave a comment:

Working...
X